 ( 193 ) 30 July, 2014
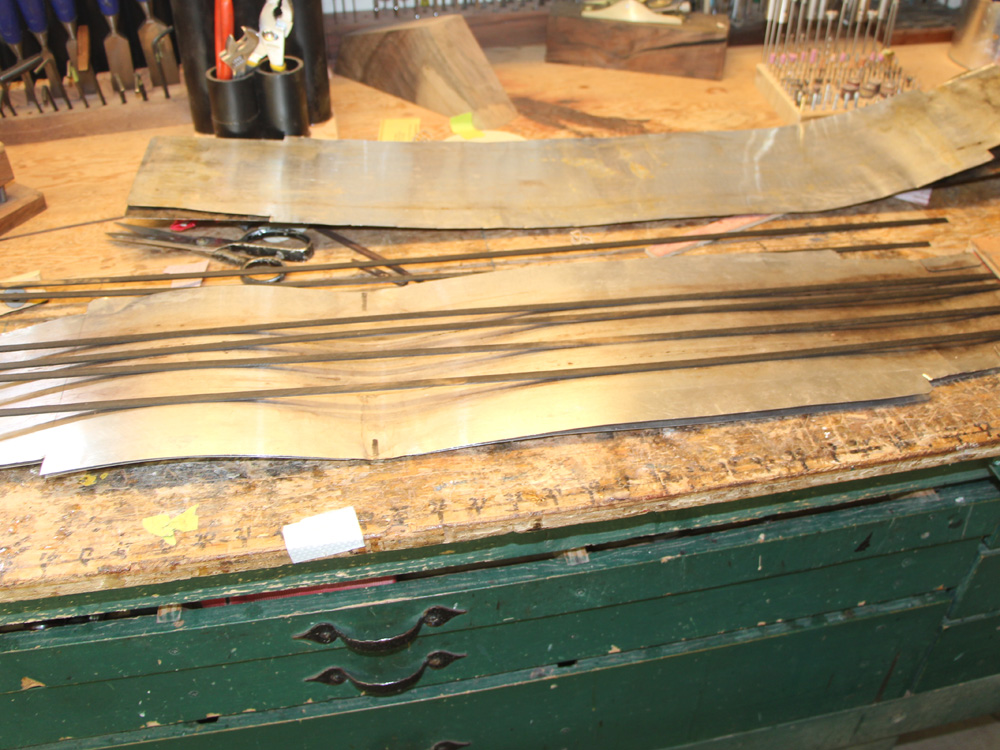
This guitar will have ebony bindings that have to be bent into the shape of the guitar. Here I have laid out the binding in the heating blanket.
( 193 ) 30 July, 2014
This guitar will have ebony bindings that have to be bent into the shape of the guitar. Here I have laid out the binding in the heating blanket.
 ( 194 ) 30 July, 2014
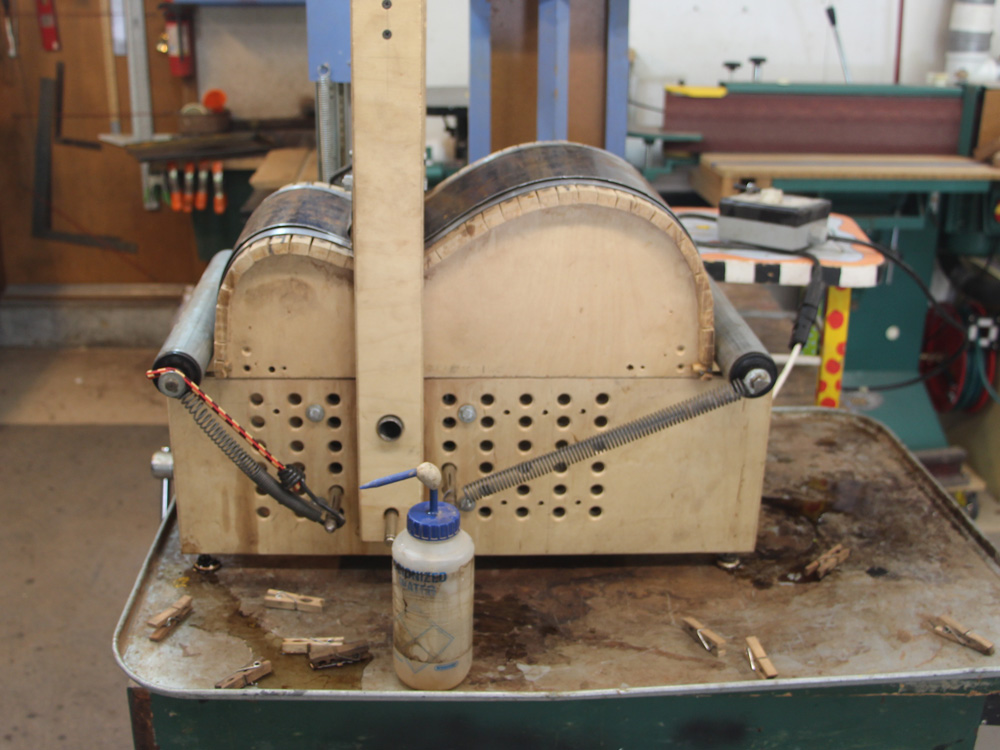
The luthiers press makes quick work of it.
 ( 195 ) 30 July, 2014
 ( 196 ) 30 July, 2014
Before cutting the channels for the binding I level the top and back with an orbital sander. During this process I thin the top around the perimeter to promote a more mobile top.
 ( 197 ) 30 July, 2014
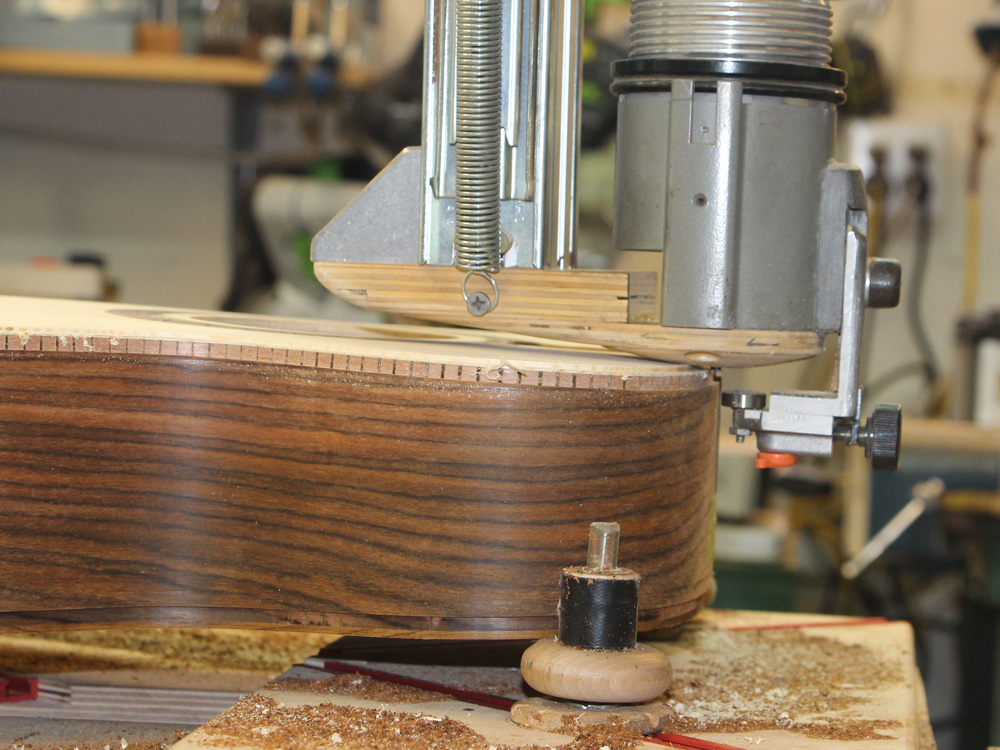
I use a binding router that gives me 5 degrees of freedom while holding the router parallel the the sides of the guitar. I use this machine because the top and back are shaped into domes and so are not perpendicular to the sides.
 ( 198 ) 30 July, 2014
I can control the depth and width of the channels.
 ( 199 ) 30 July, 2014
The platen on the router has a convex shape so it only contacts the top of the guitar right next to the router bit.
 ( 200 ) 30 July, 2014
I go round and round until I stop removing wood.
 ( 201 ) 30 July, 2014
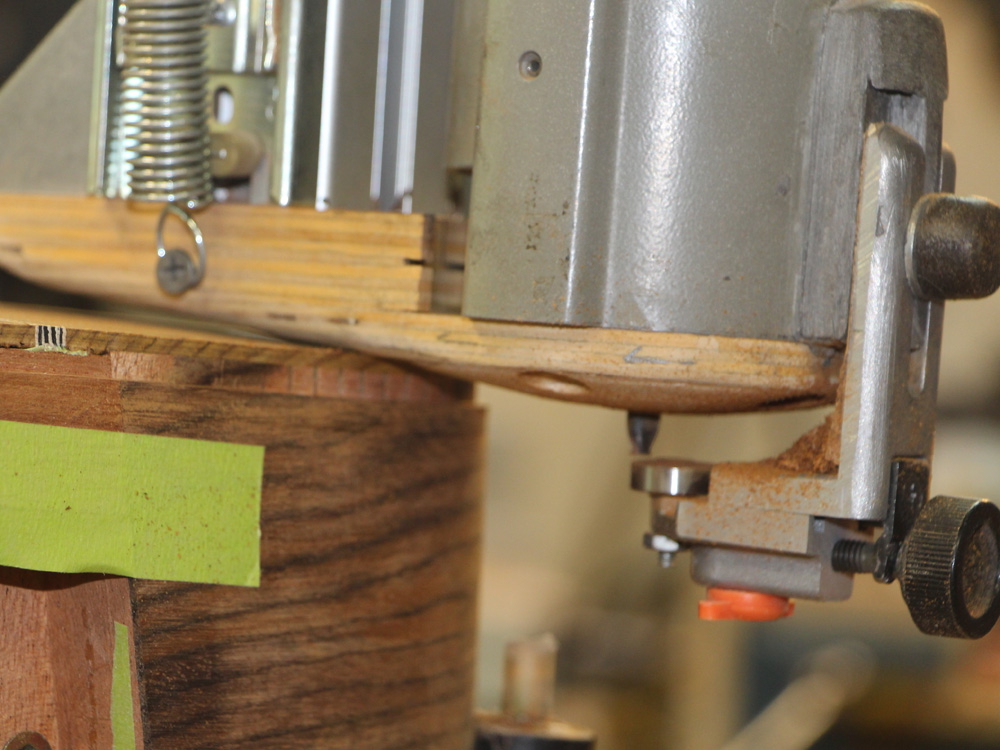
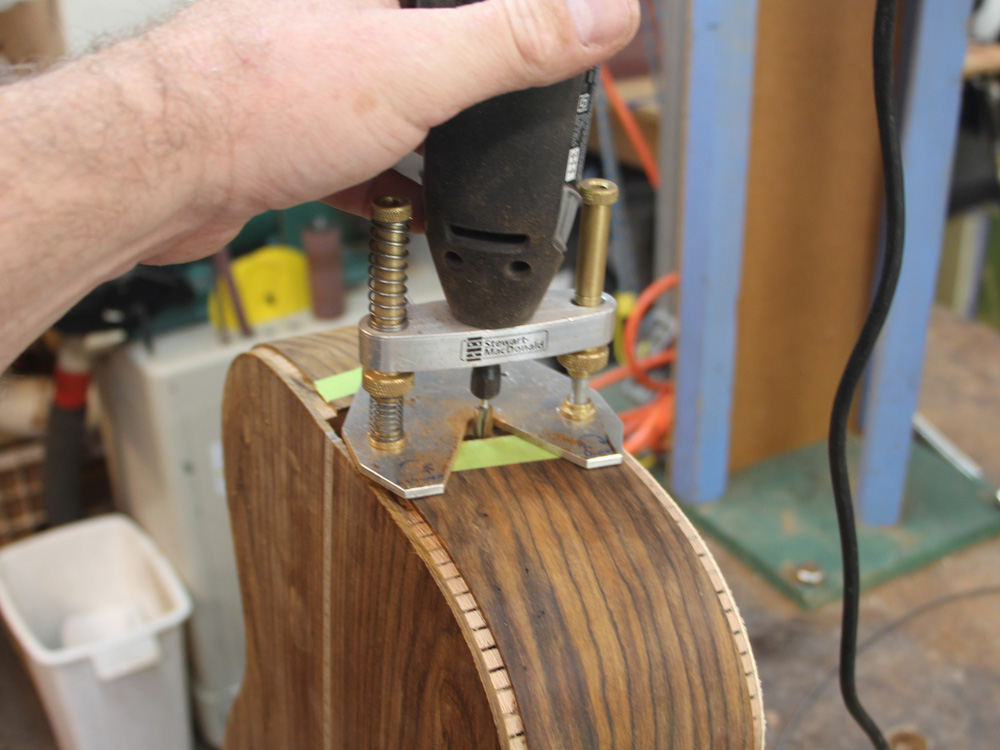
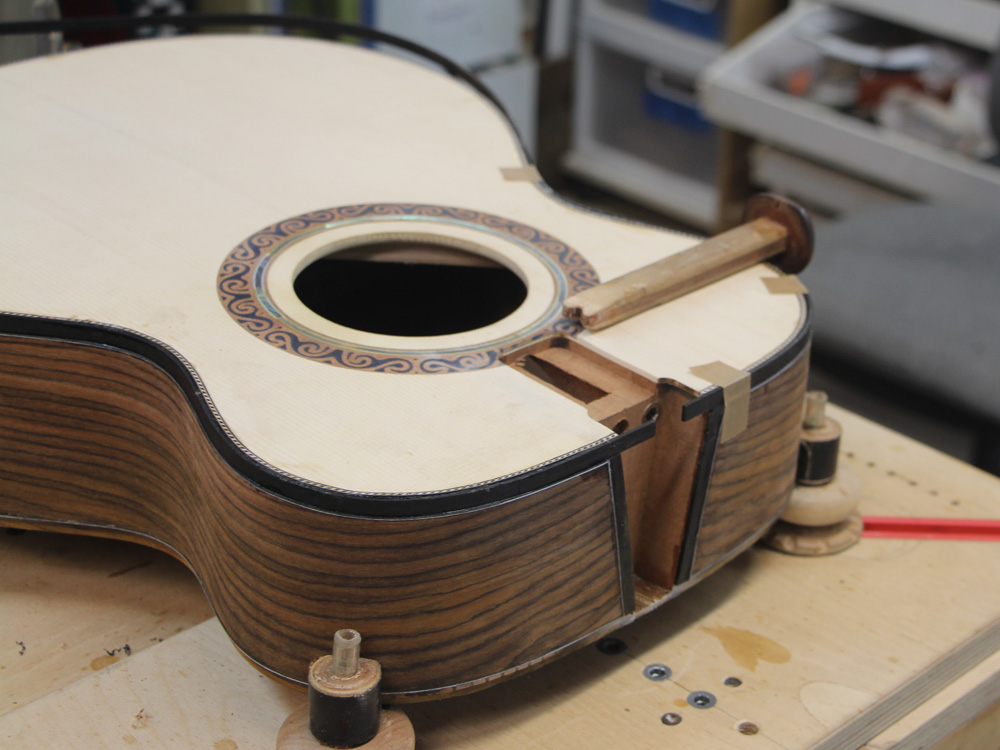
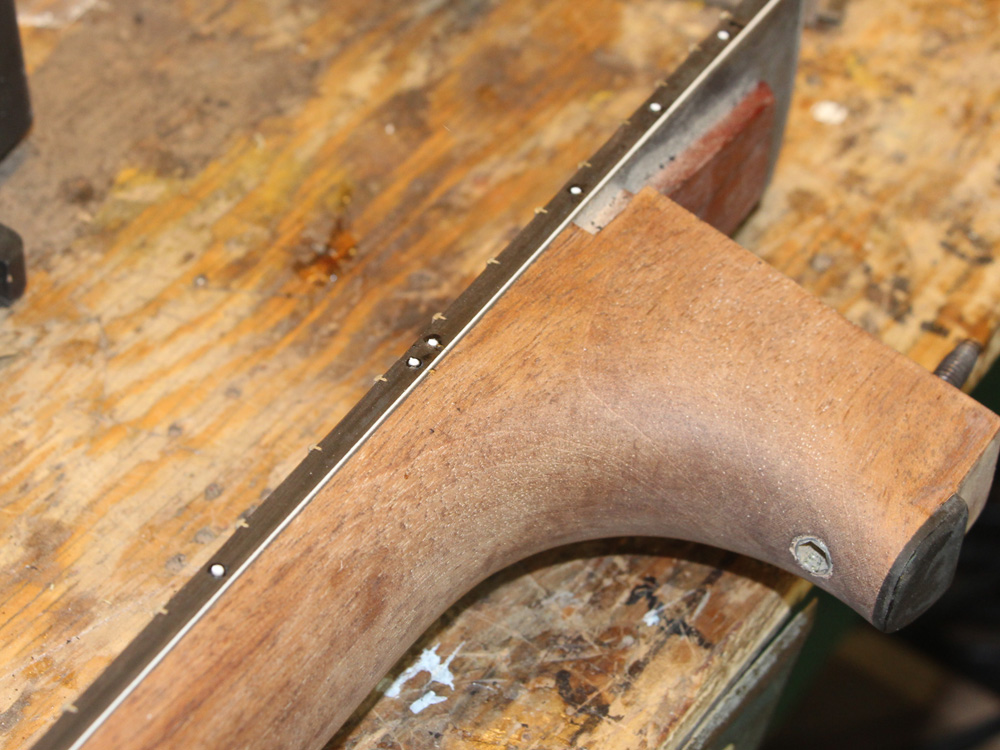
I mark the edge of the binding around the heel of the neck with a sharp knife.
 ( 202 ) 30 July, 2014
And then I use a small router to route out the channel.
 ( 203 ) 30 July, 2014
I follow up with a variety of hand tools.
 ( 204 ) 30 July, 2014
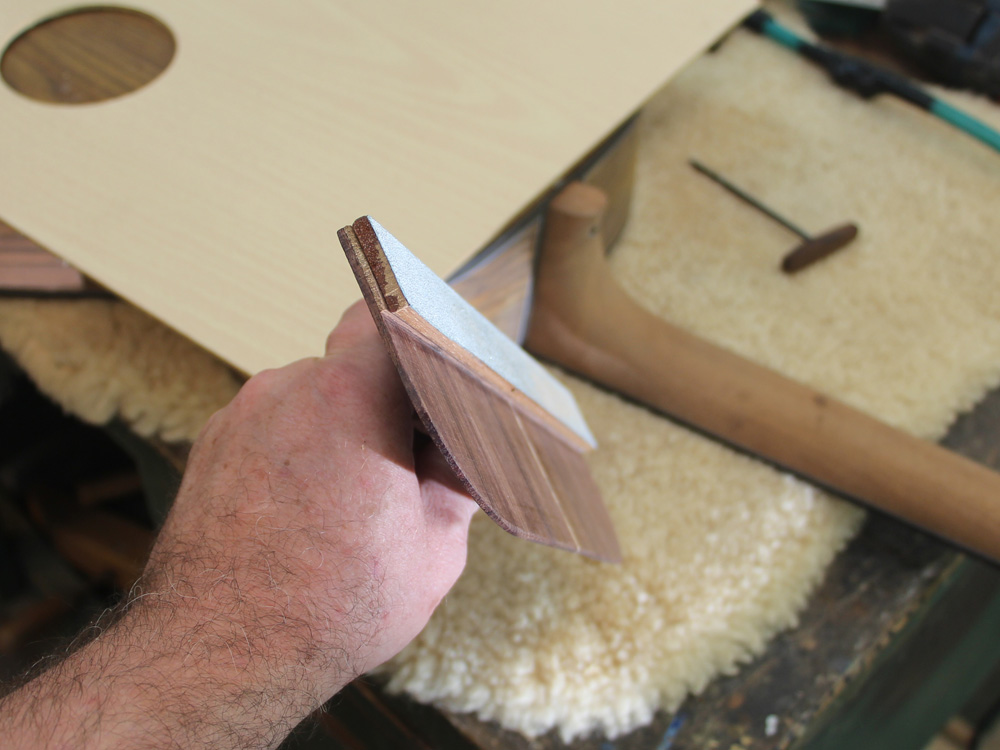
With all of the channels cut I start to install the purfling.
 ( 205 ) 30 July, 2014
To ensure a good fit I install one strip at a time.
 ( 206 ) 30 July, 2014
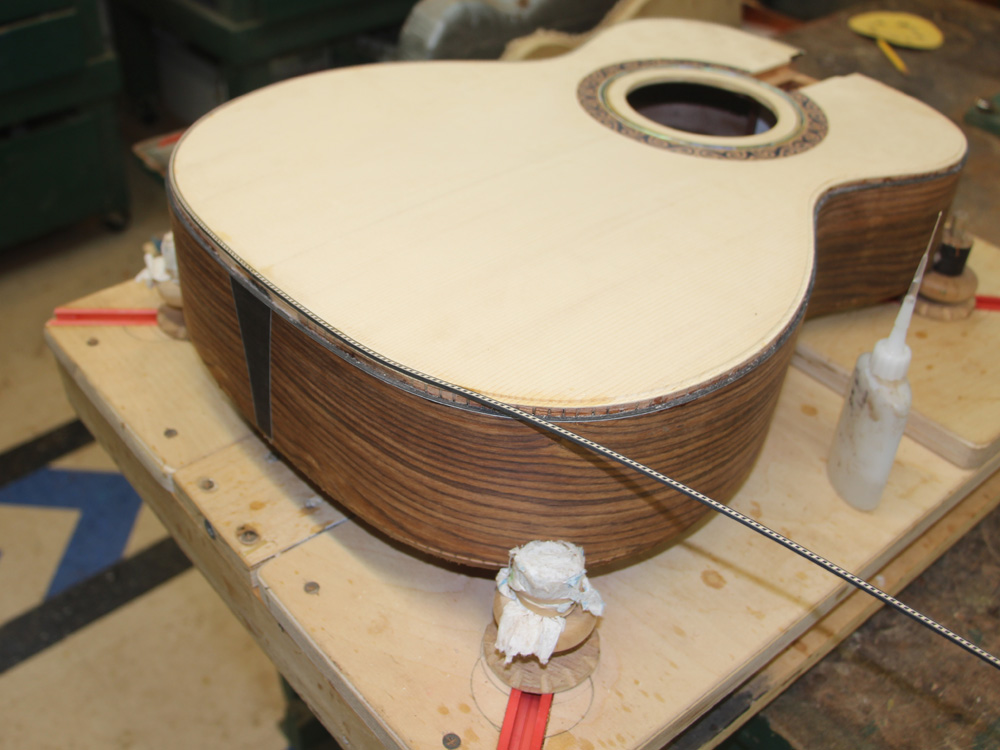
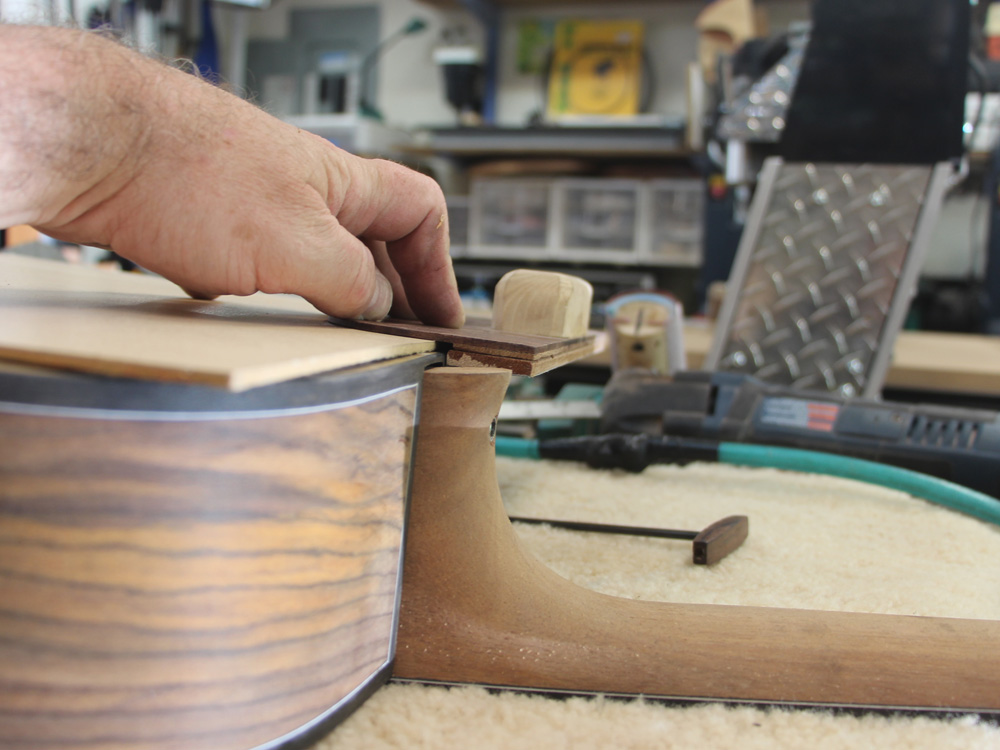
The binding goes on last. I start by setting the binding around the heel.
 ( 207 ) 30 July, 2014
And then I work my way around the guitar.
 ( 208 ) 30 July, 2014
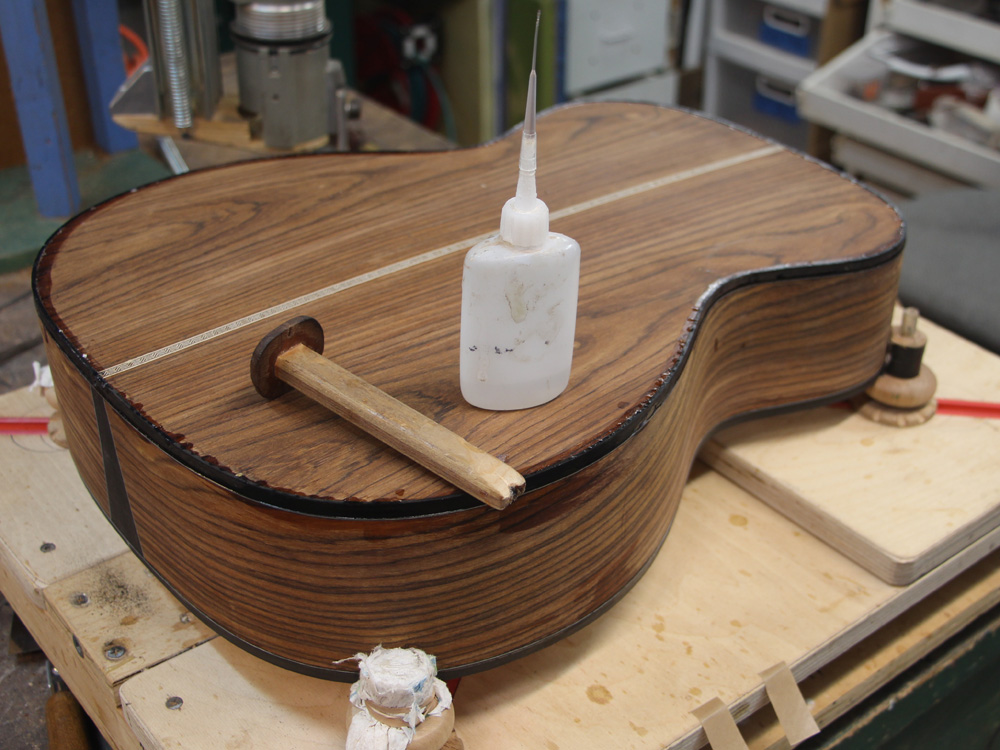
Some of the tools and glue I use.
 ( 209 ) 30 July, 2014
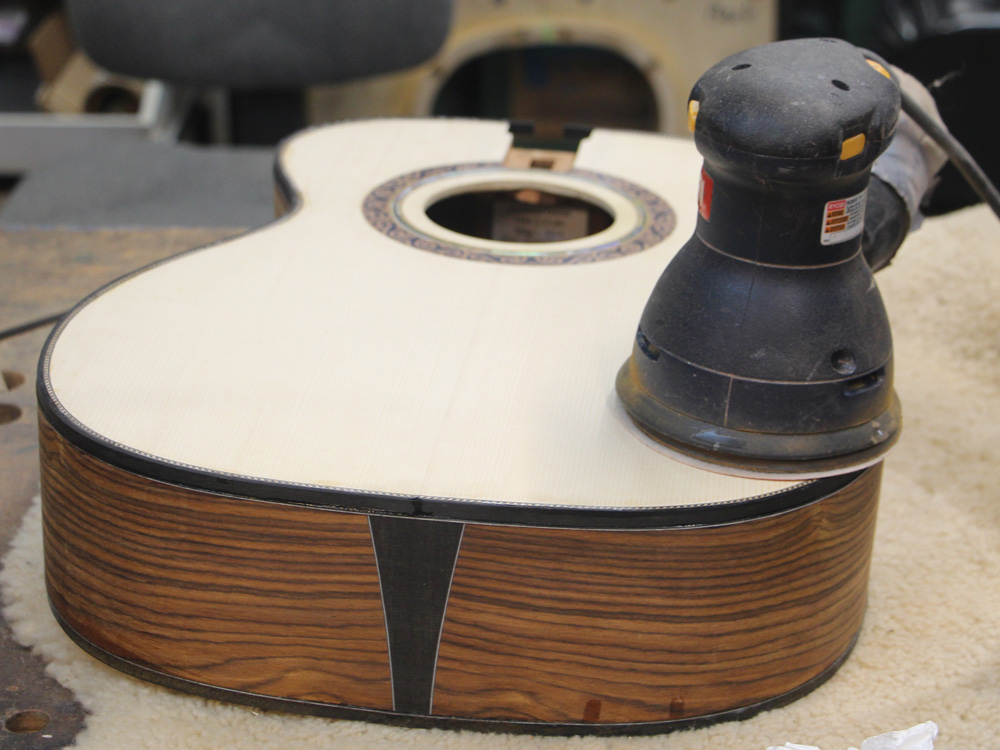
When everything is installed the binding is slightly proud of the top. I use a palm sander to level the top.
 ( 210 ) 30 July, 2014
I install the binding so the sides are slightly proud of the binding. Then I use a variety of tools to level the sides to the binding. This process insures that the binding doesn't get sanded too thin.
 ( 211 ) 30 July, 2014
I use a couple of different tools to trim off the excess binding.
 ( 212 ) 30 July, 2014
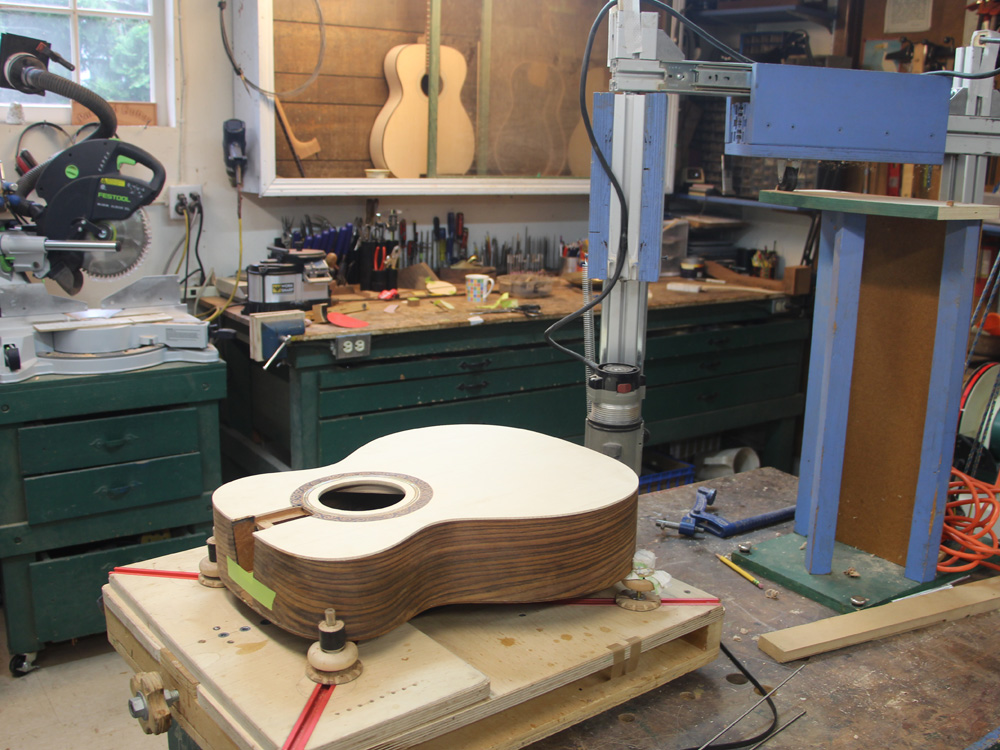
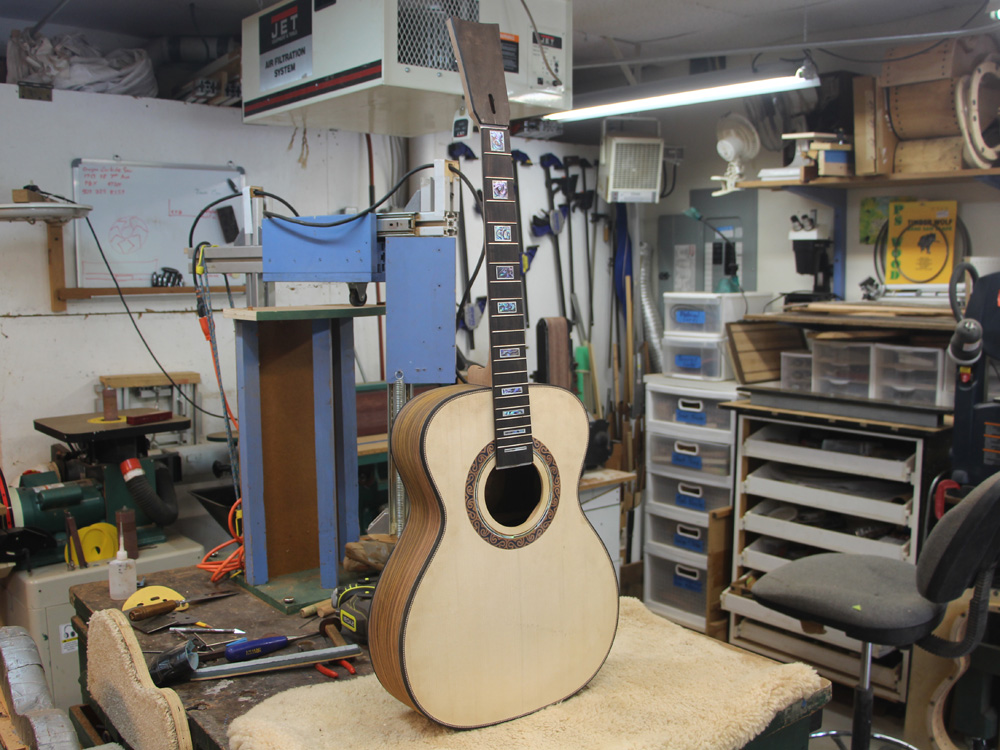
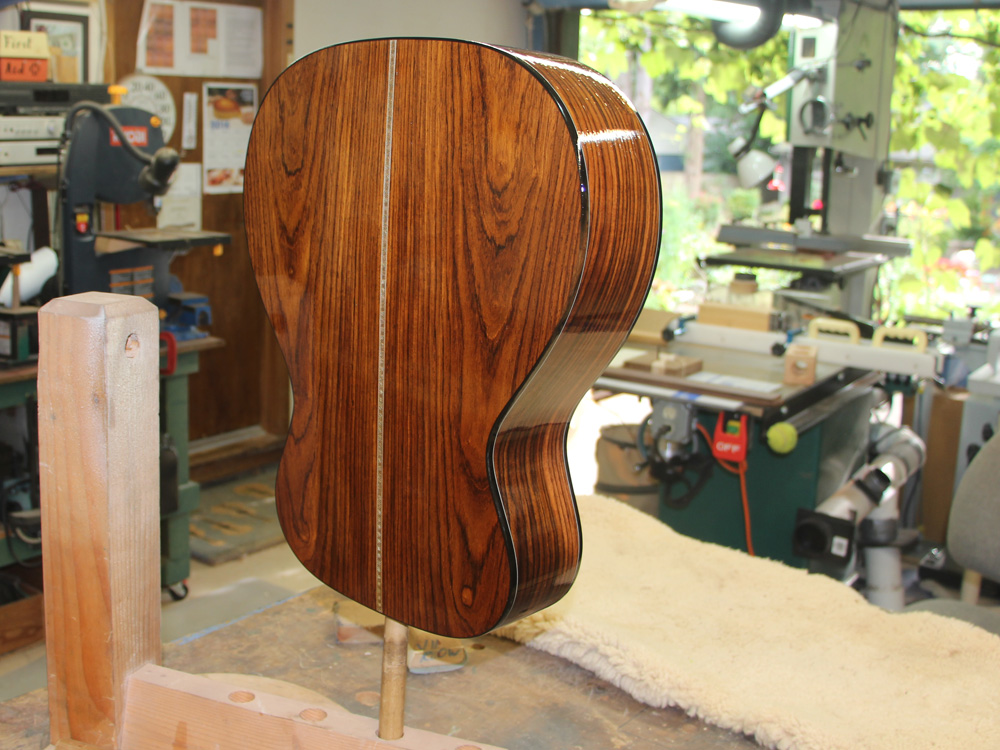
And now I can put everything together for a quick look.
 ( 213 ) 30 July, 2014
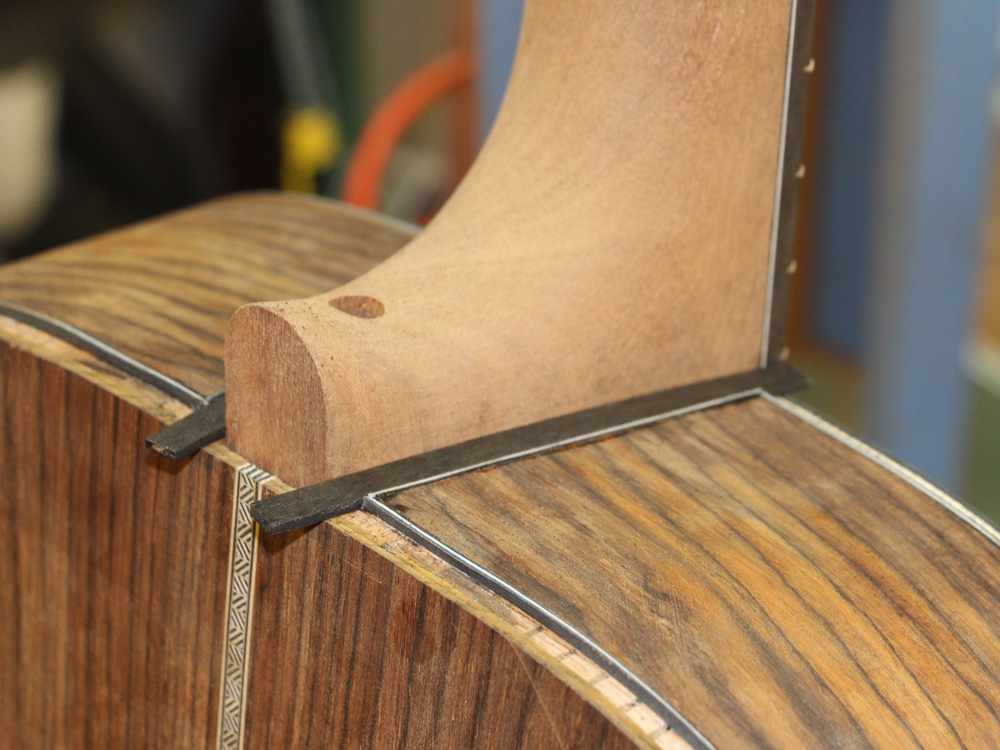
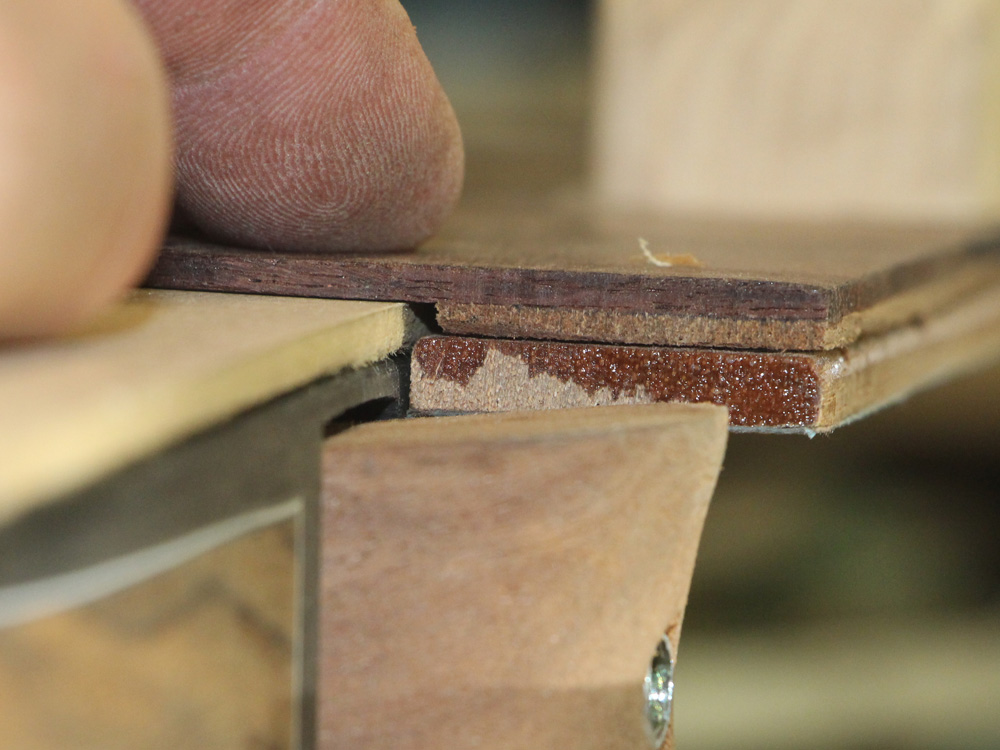
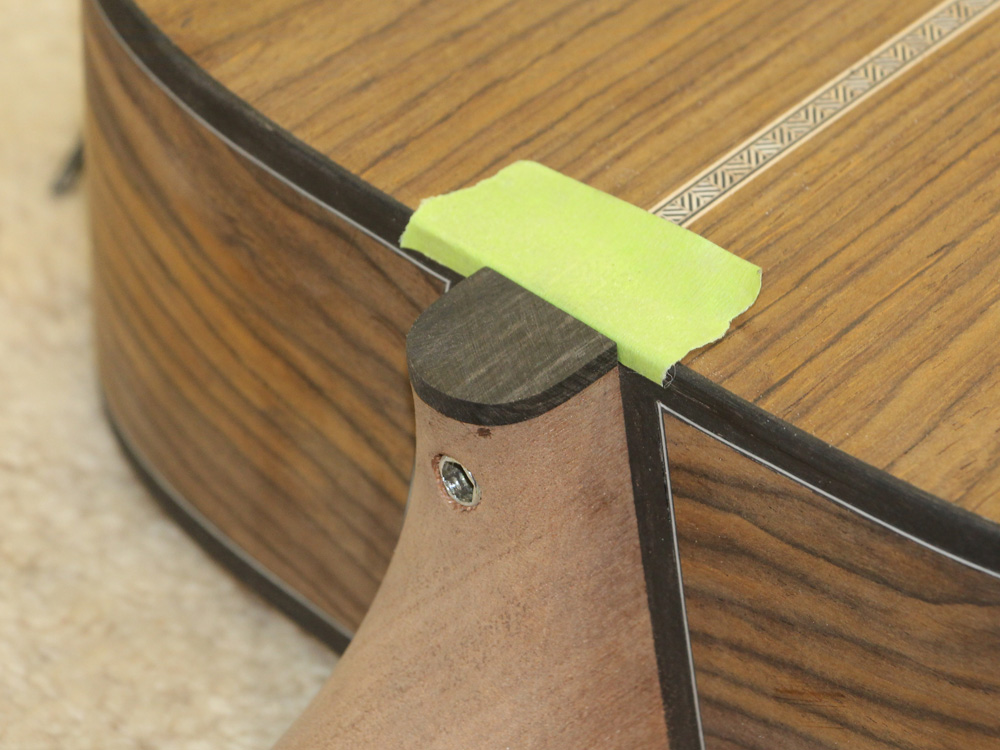
The binding fits snug to the heel so it is difficult to see the separation line.
 ( 214 ) 30 July, 2014
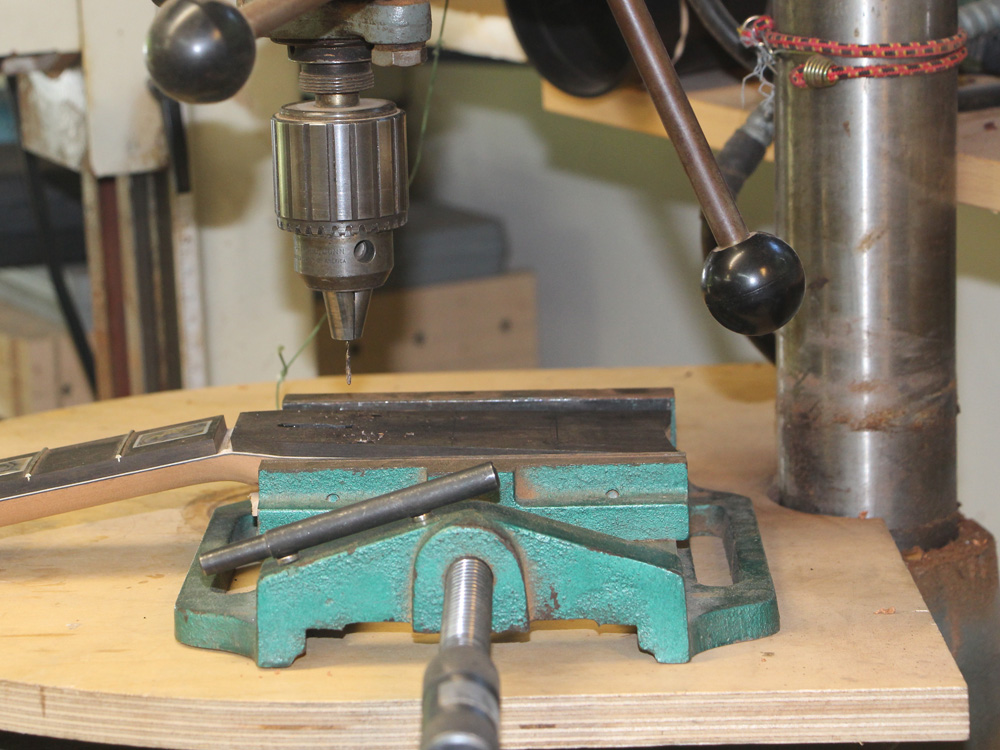
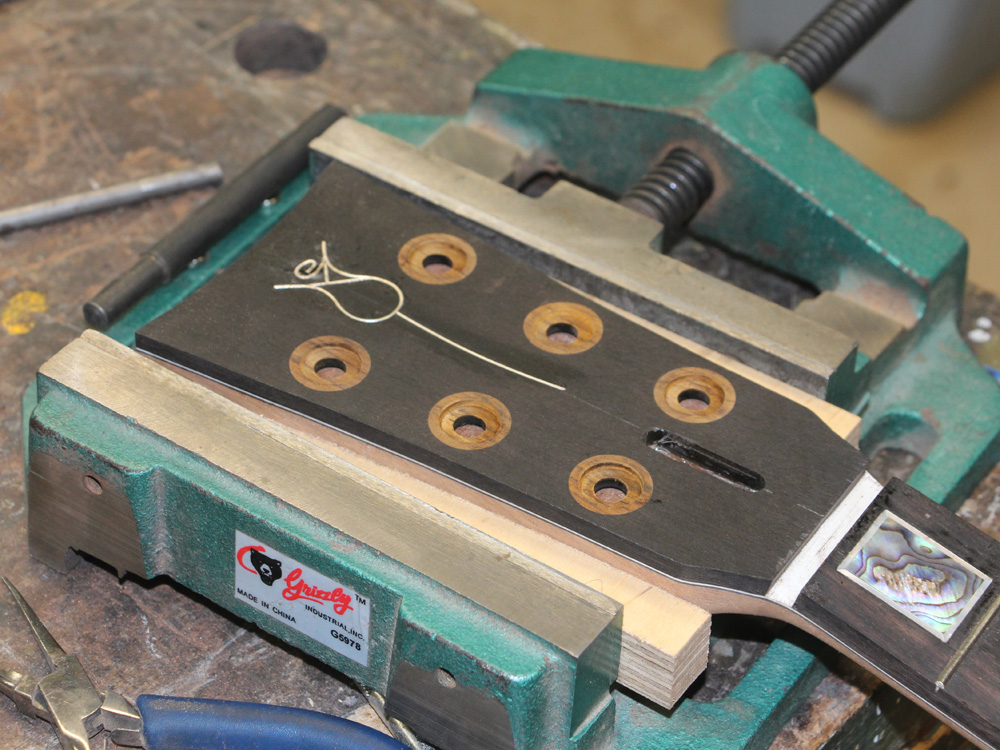
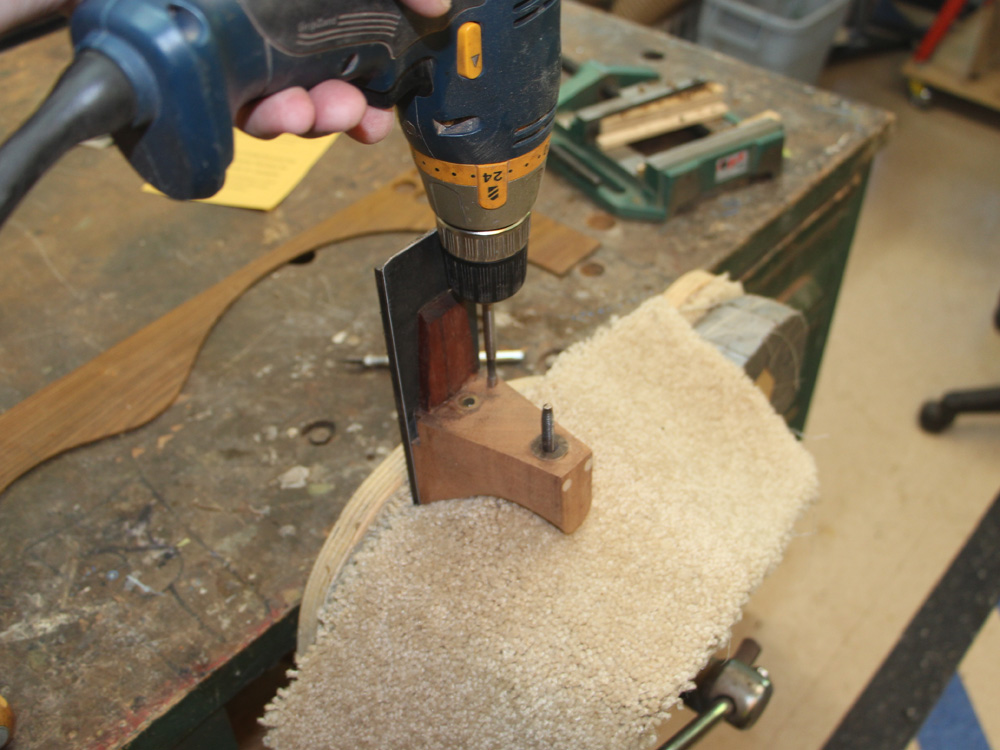
Here I am drilling pilot holes for the tuning machines.
 ( 215 ) 30 July, 2014
I have drilled out holes for frames around each peg.
 ( 216 ) 30 July, 2014
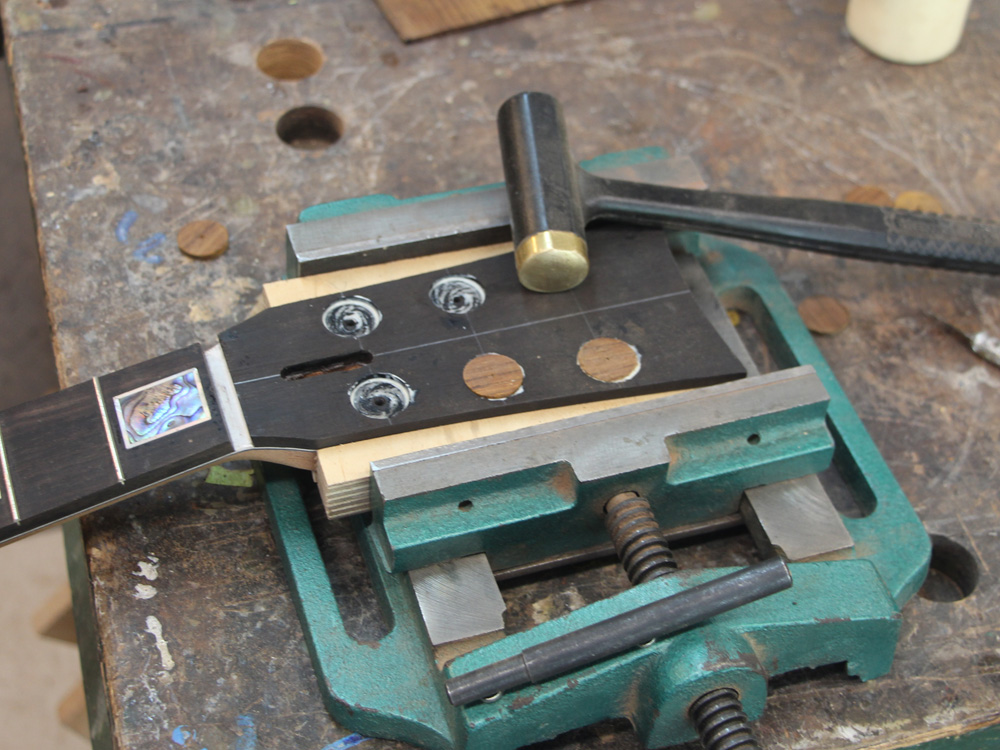
I cut disks from the left over Cocobolo from the back plate. ... I rarely throw any piece of wood away.
 ( 217 ) 30 July, 2014
The disks stand a bit proud so I use a palm sander to level them.
 ( 218 ) 30 July, 2014
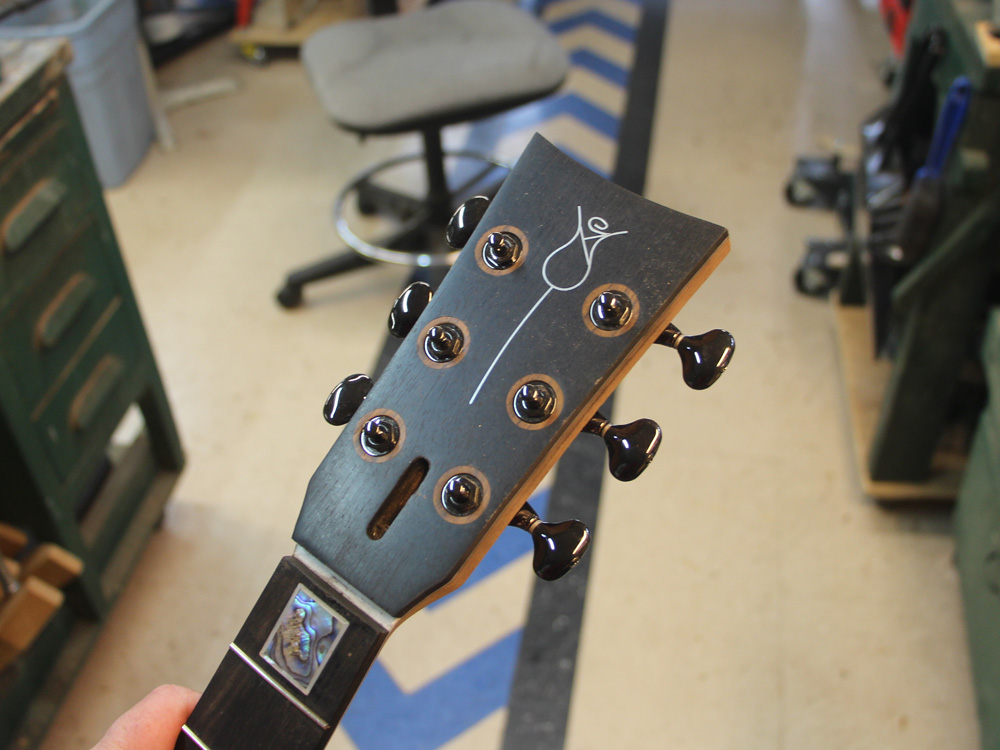
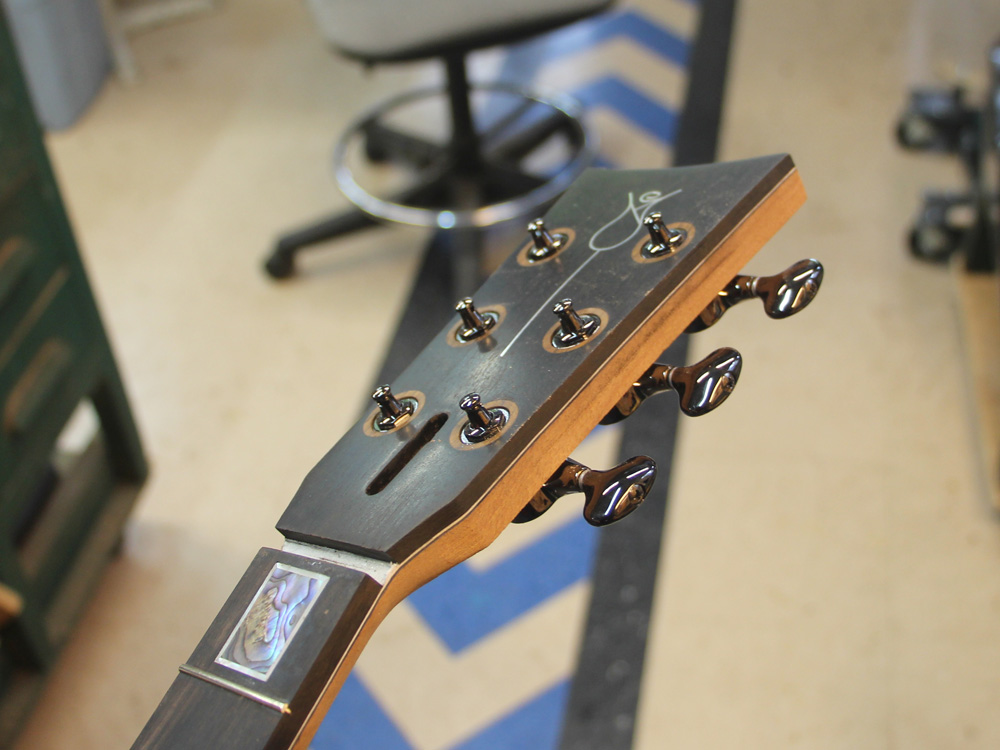
After drilling holes for the tuning machines. The Cocobolo disks make nice frames for the tuning pegs.
 ( 219 ) 30 July, 2014
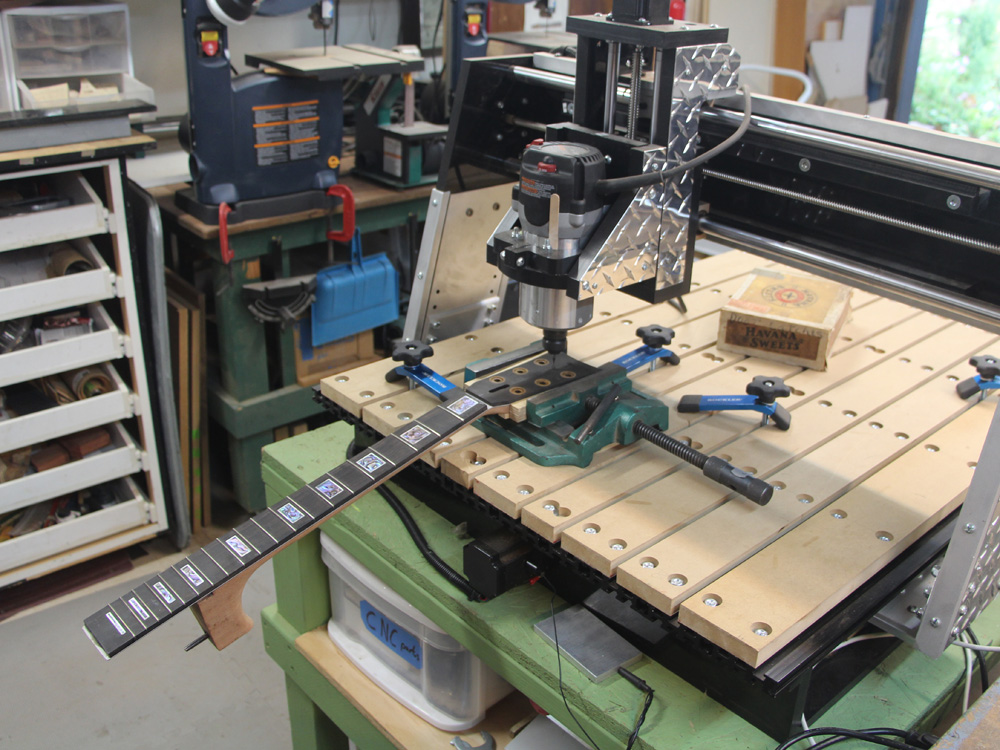
I use my CNC router to route out the channel for the headstock inlay.
 ( 220 ) 30 July, 2014
It makes very clean and precise channels.
 ( 221 ) 30 July, 2014
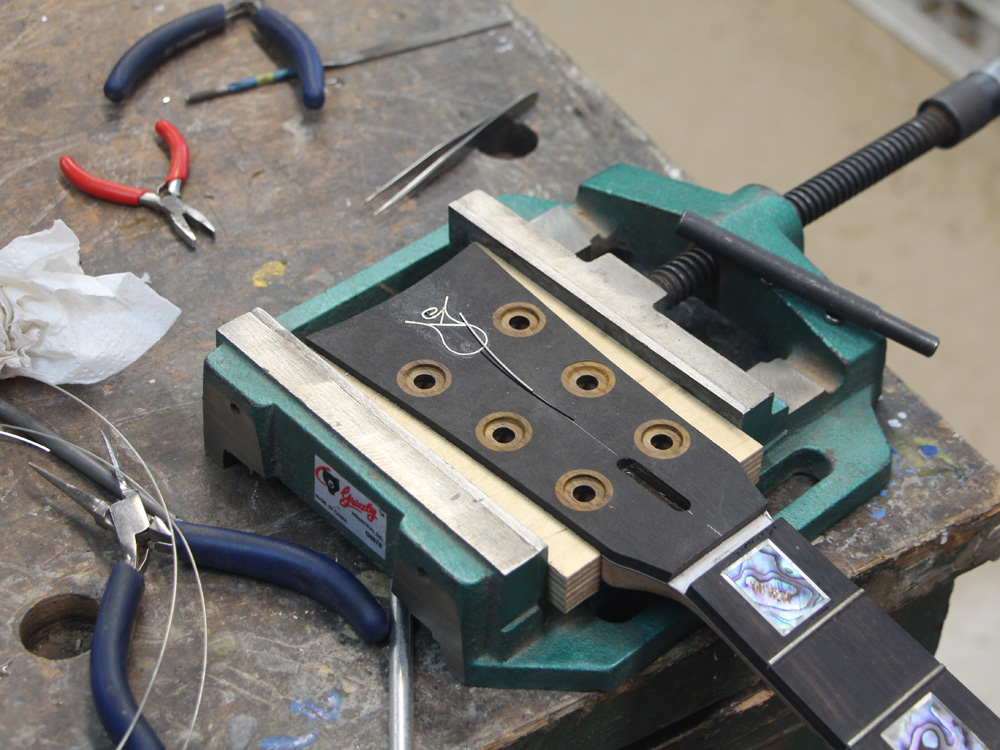
Then using square Silver wire I set the "Portland Guitar Rose".
 ( 222 ) 30 July, 2014
 ( 223 ) 30 July, 2014
A bit of leveling and polishing.
 ( 224 ) 30 July, 2014
My daughters name is Jasmine Rose and I asked her to design a rose for my company icon. This was the result, so this is "The Portland Guitar Jasmine Rose."
 ( 225 ) 30 July, 2014
 ( 226 ) 30 July, 2014
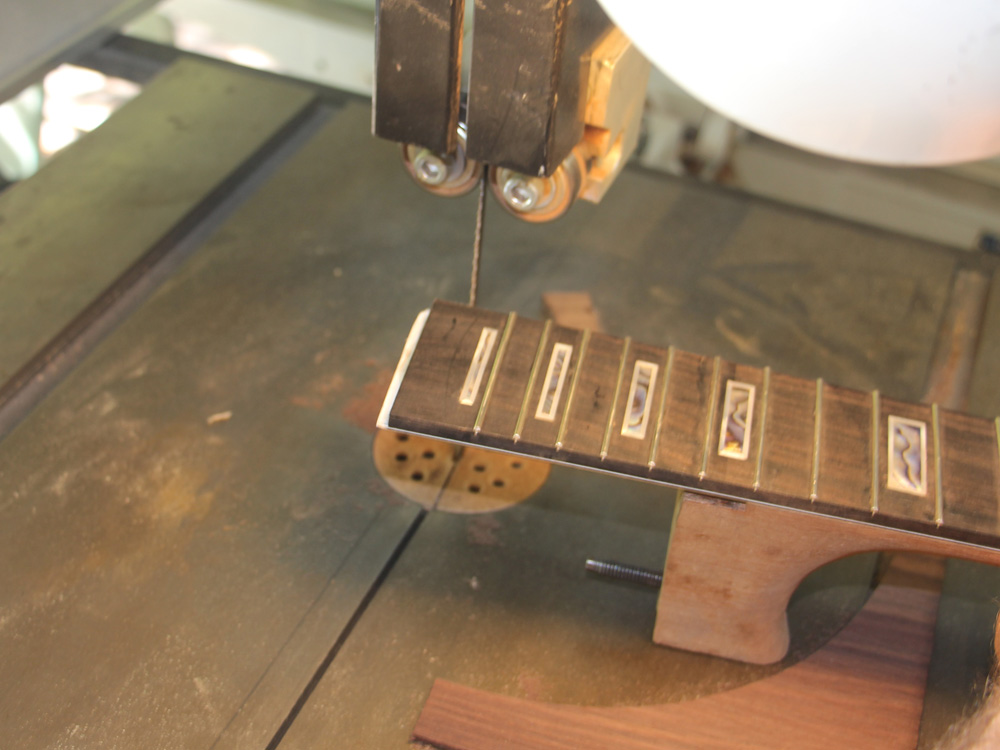
I cut off the end of the fretboard with a bandsaw.
 ( 227 ) 30 July, 2014
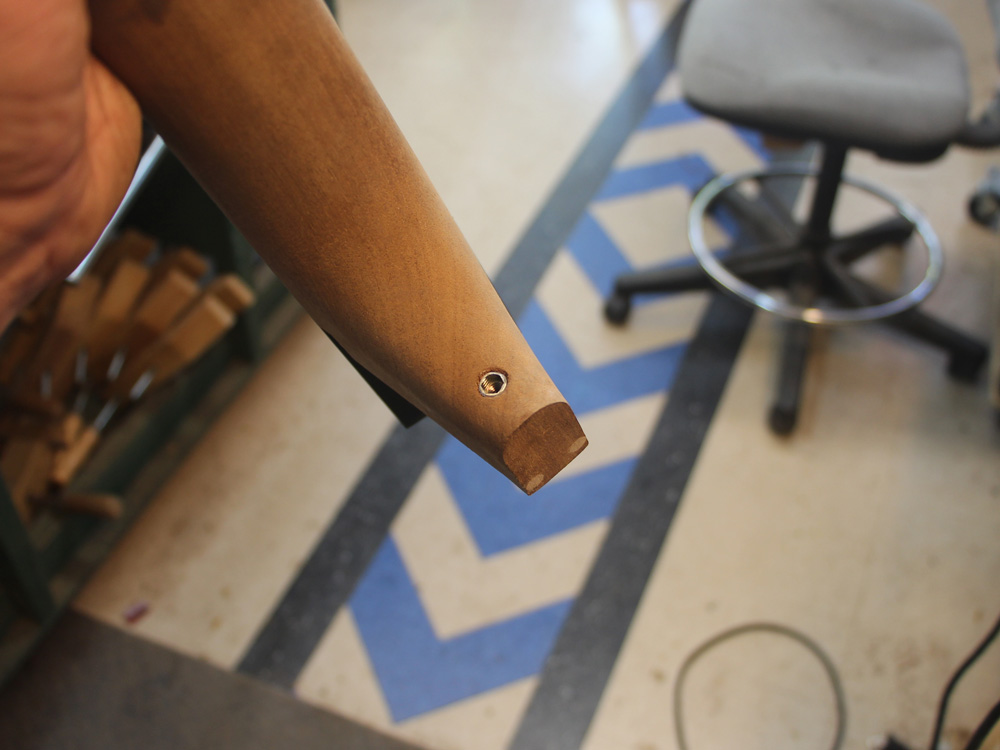
I install a 1/4-20 threaded wood insert into Tilt Action Neck adjustment access hole. Then to cover the hole I will make a strap button to go into the wood insert.
 ( 228 ) 30 July, 2014
 ( 229 ) 30 July, 2014
I use this very special sanding tool the level the end of the heel so it is parallel to the back of the guitar.
 ( 230 ) 30 July, 2014
I place a spacer on the back of the guitar to get the correct height.
 ( 231 ) 30 July, 2014
And then run the tool back and forth until I stop removing material from the end of the heel.
 ( 232 ) 30 July, 2014
When I am finished the end of the heel is parallel to the back.
 ( 233 ) 30 July, 2014
Then I glue a heel cap to the end and sand it flush with the back.
 ( 234 ) 30 July, 2014
A little finish work rounds the edges.
 ( 235 ) 30 July, 2014
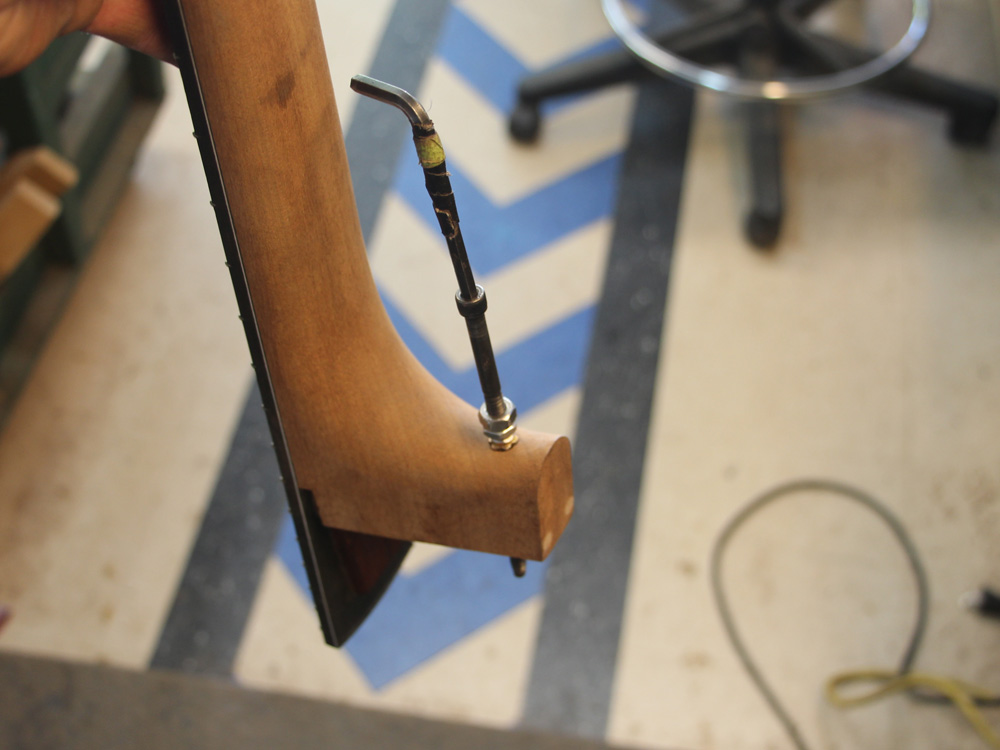
Next I install a set of brass rods in the back of the heel where the set screws in the heel channel will make contact.
 ( 236 ) 30 July, 2014
These brass plugs make for firm and well defined contact points between the neck and the body.
 ( 237 ) 30 July, 2014
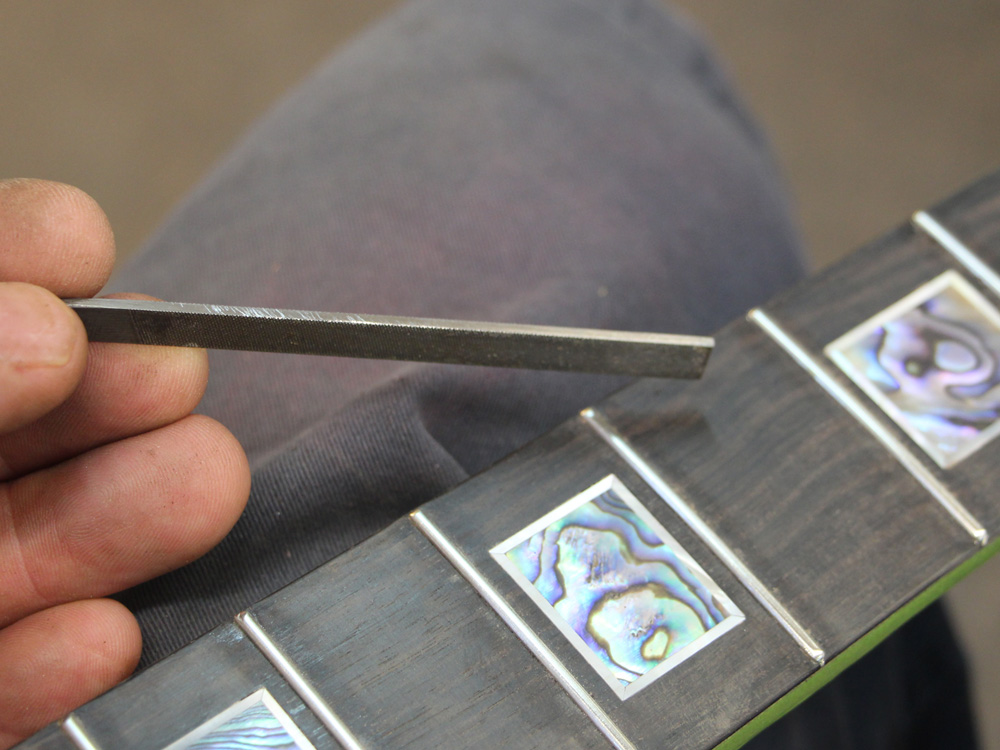
I drill a few quick holes in the edge of the fretboard and install the fret markers.
 ( 238 ) 30 July, 2014
Now with all of the parts completed I am ready to start the finishing process. I start by apply a couple of coats of epoxy to fill the pores in the wood.
 ( 239 ) 30 July, 2014
I will apply a coat of epoxy, let it set and then sand it level. I repeat this until all of the pores are filled. and I have a smooth level surface.
 ( 240 ) 30 July, 2014
 ( 241 ) 30 July, 2014
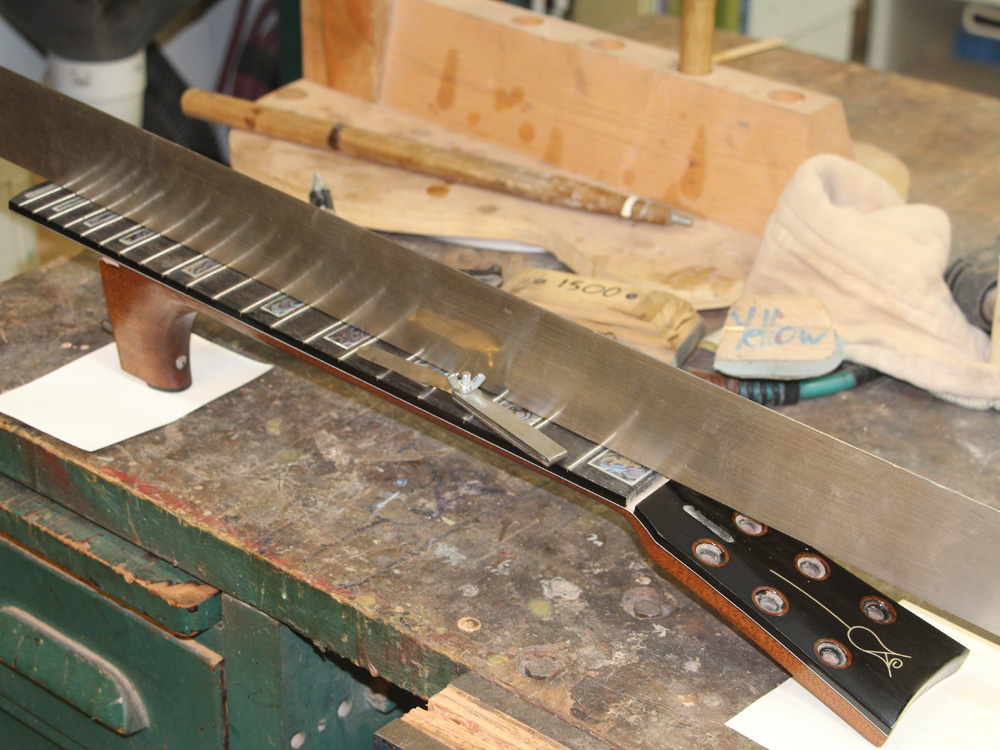
Before I apply the finishing lacquer I level and dress the frets. I start by adjusting the truss rod until I get the fretboard as straight as possible. I use a straight edge and a 2 mil feeler gauge to measure the straightness of the fretboard.
 ( 242 ) 30 July, 2014
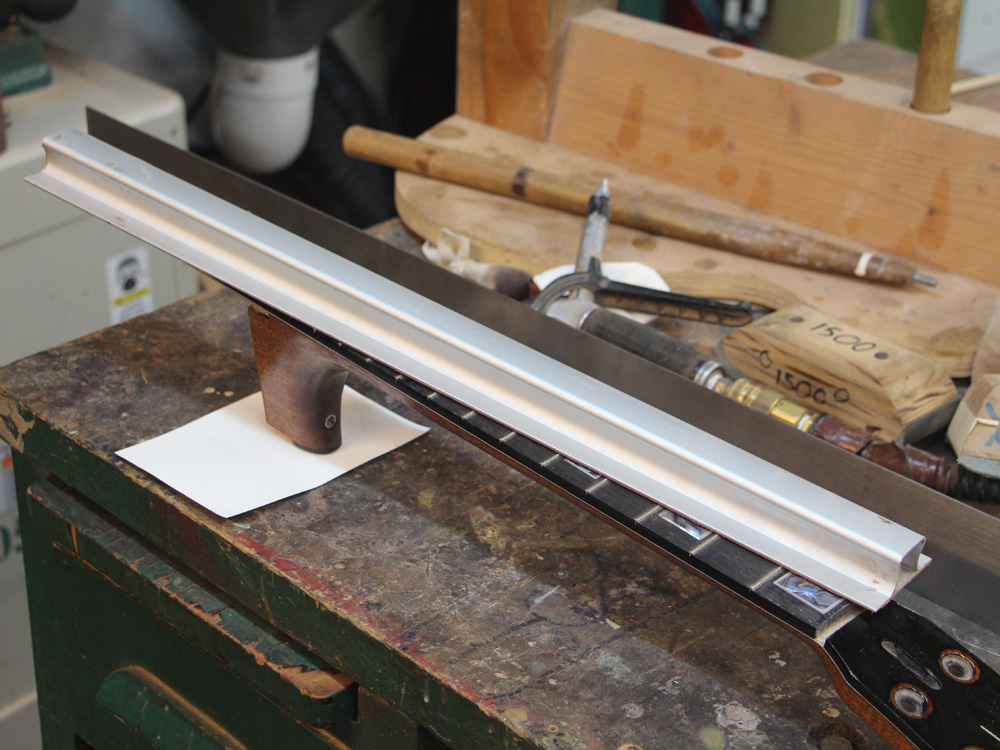
Then I use a very long very straight sanding block to level all of the frets.
 ( 243 ) 30 July, 2014
Then I use a contoured sanding stick to shape to crown of the frets.
 ( 244 ) 30 July, 2014
Next I use a small hand file to create little hemispheres on the end of each fret.
 ( 245 ) 30 July, 2014
 ( 246 ) 30 July, 2014
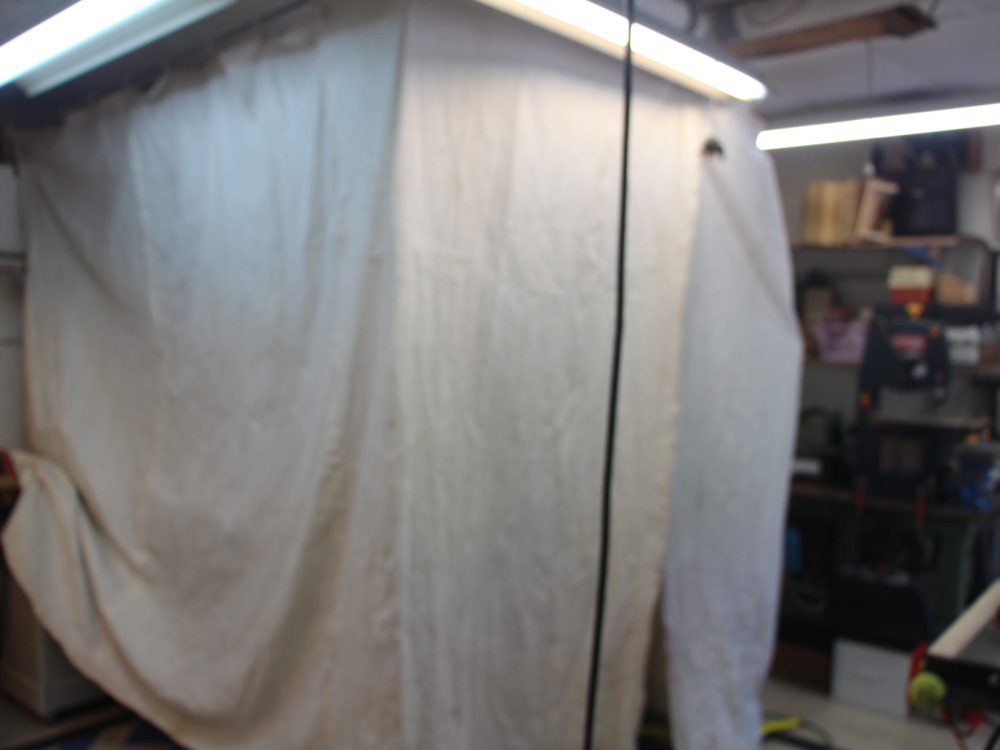
I set up a temporary paint booth in my shop. I run a dust filter in the tent to remove the over spray and limit the air born dust.
 ( 247 ) 30 July, 2014
I set up the body of the guitar on this rotating fixture so I can have easy access to all of the surfaces.
 ( 248 ) 30 July, 2014
I put a balloon in the sound hole to keep the spray out.
 ( 249 ) 30 July, 2014
With the lacquer applied and allowed to cure for some time; next up is the polishing process.
 ( 250 ) 26-Aug-2014
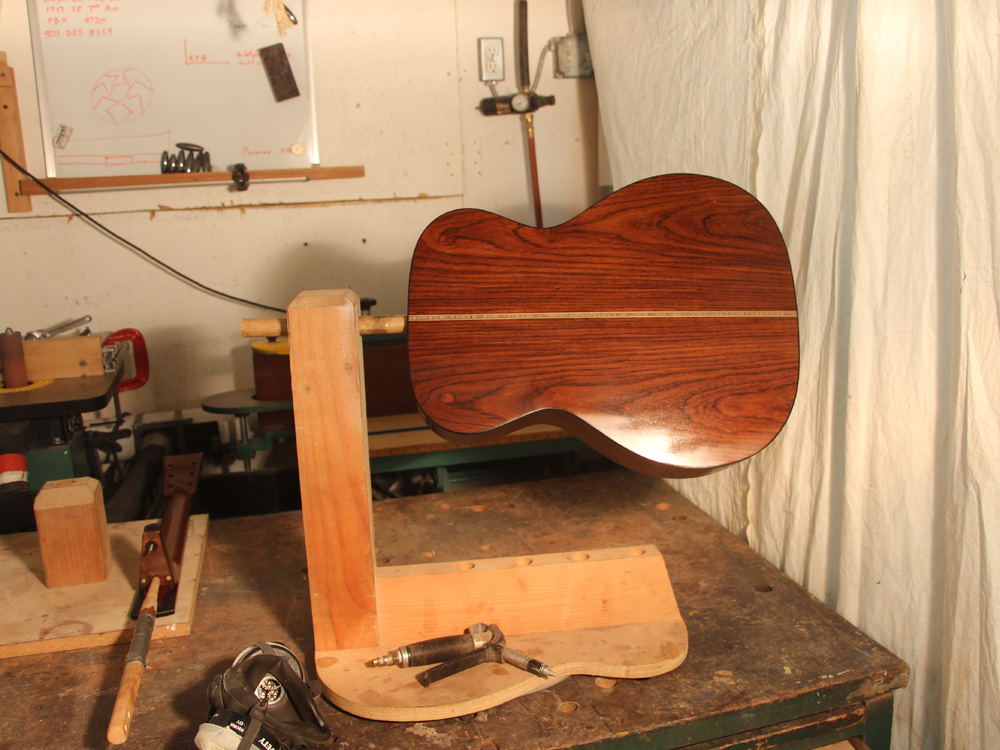
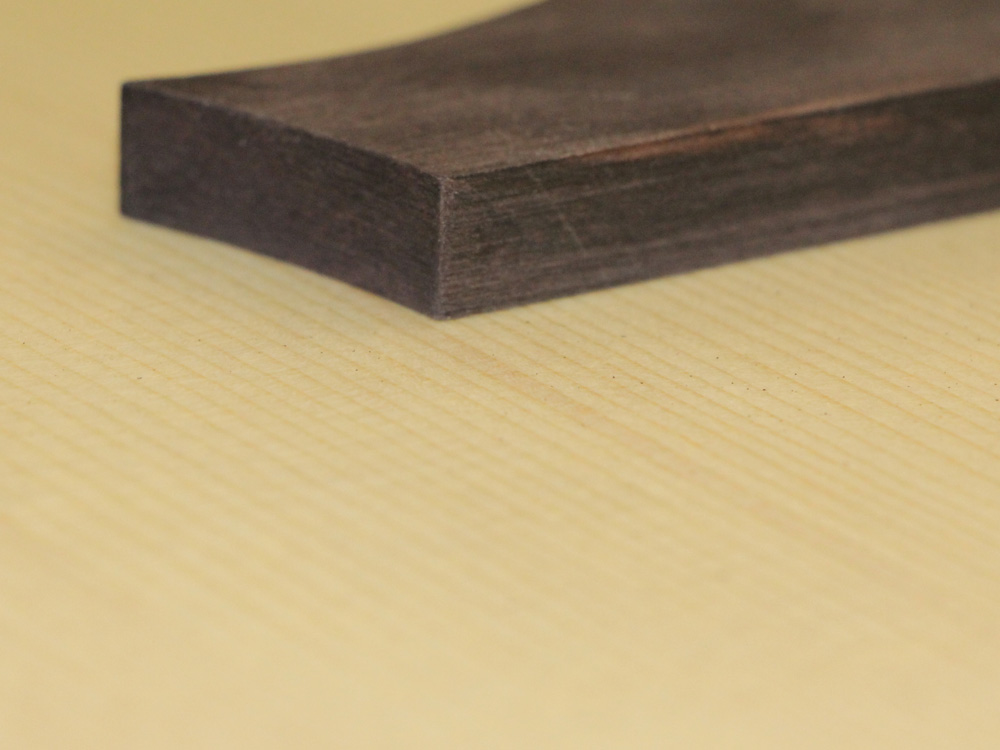
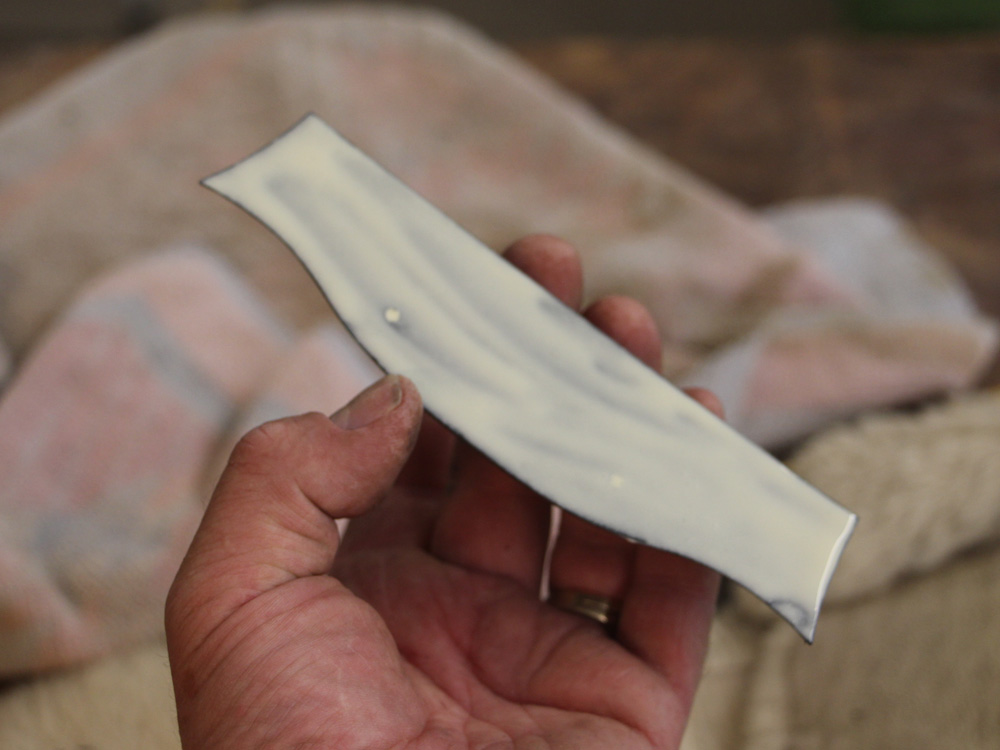
This sanding block has the same shape as the top of the guitar. I use this to shape the bottom of the bridge.
 ( 251 ) 26-Aug-2014
 ( 252 ) 26-Aug-2014
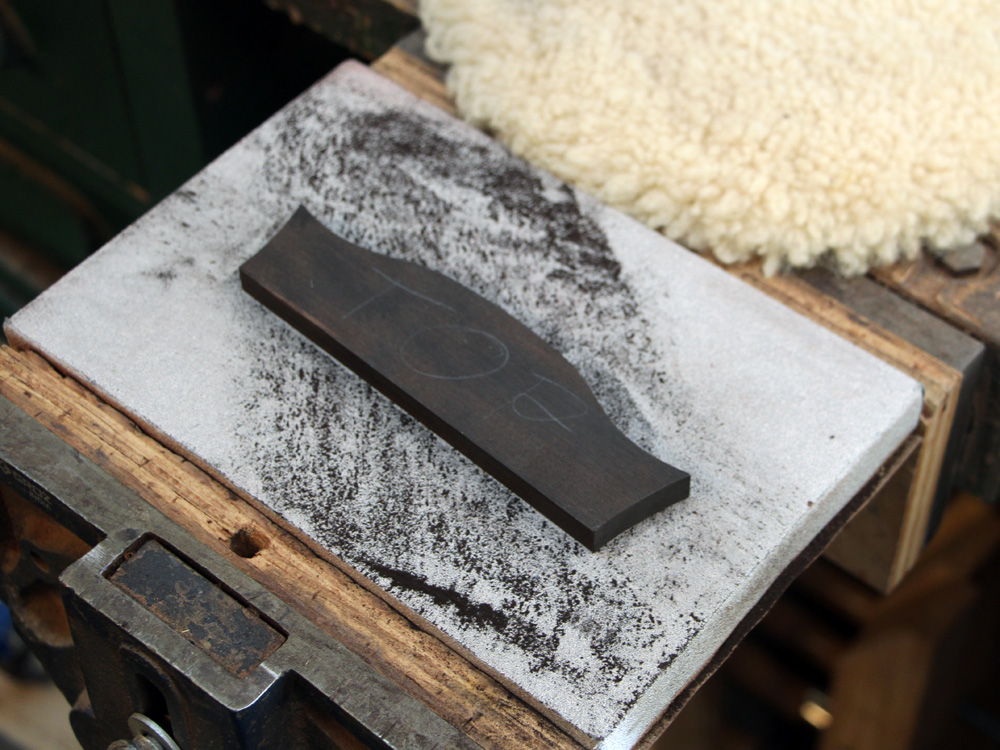
I work the bottom of the bridge blank until it makes a good fit to the top.
 ( 253 ) 26-Aug-2014
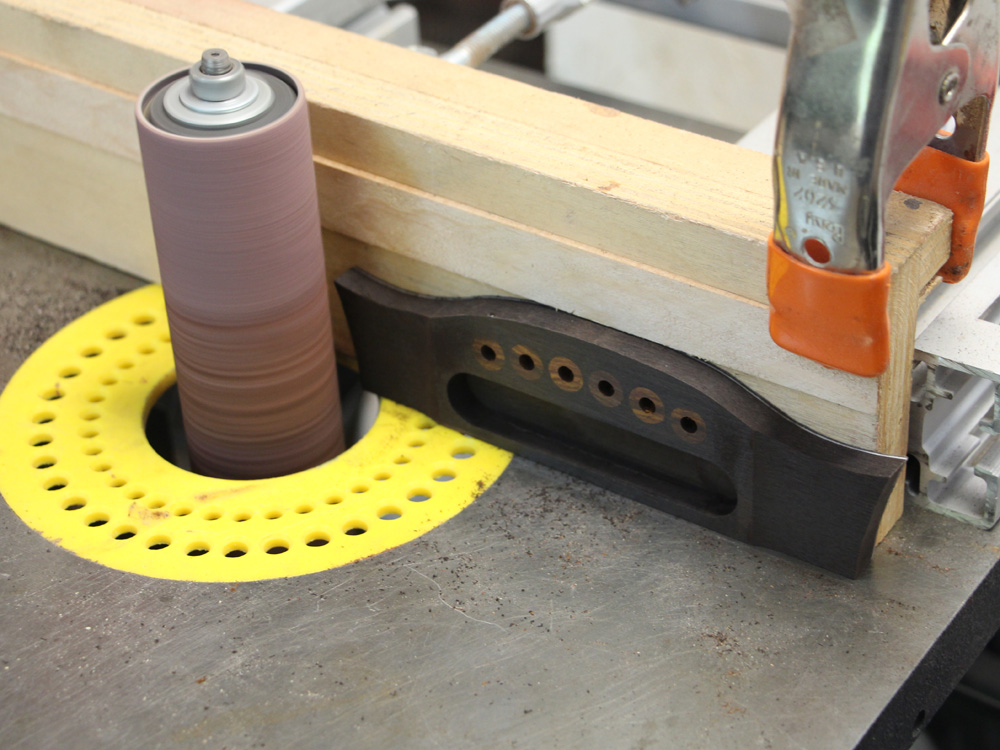
After a bit of work with the milling machine to make the saddle plate channel and the bridge pin holes, I use the oscillating sander to make he wings.
 ( 254 ) 26-Aug-2014
 ( 255 ) 26-Aug-2014
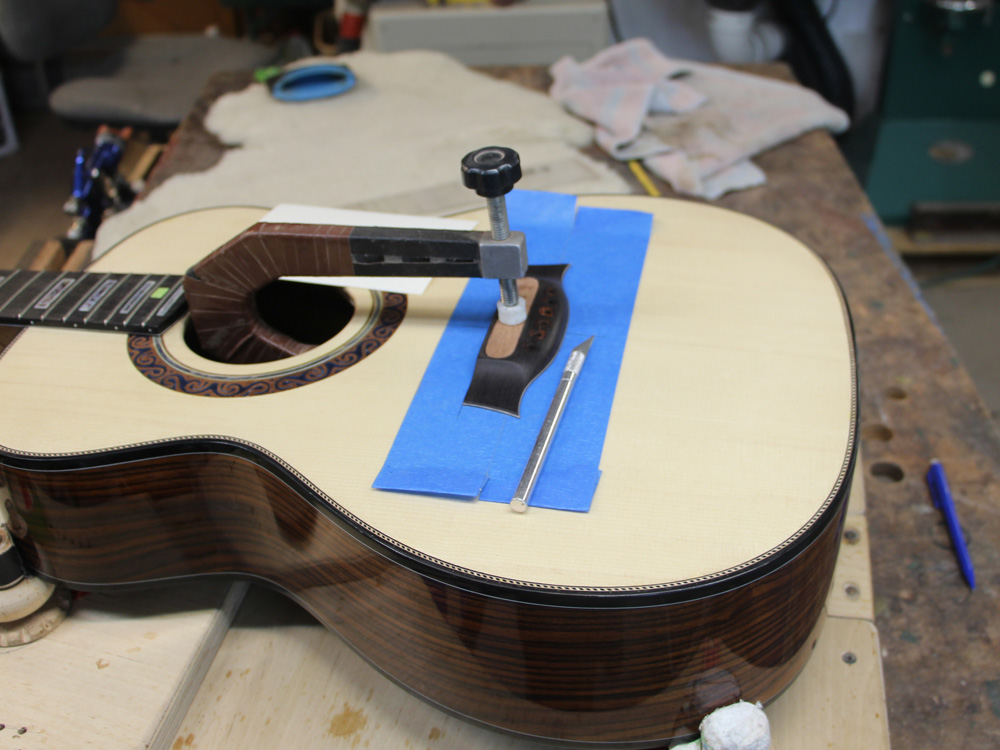
To make a good joint between the bridge and the top, I need to remove the lacquer where the bridge will go.
 ( 256 ) 26-Aug-2014
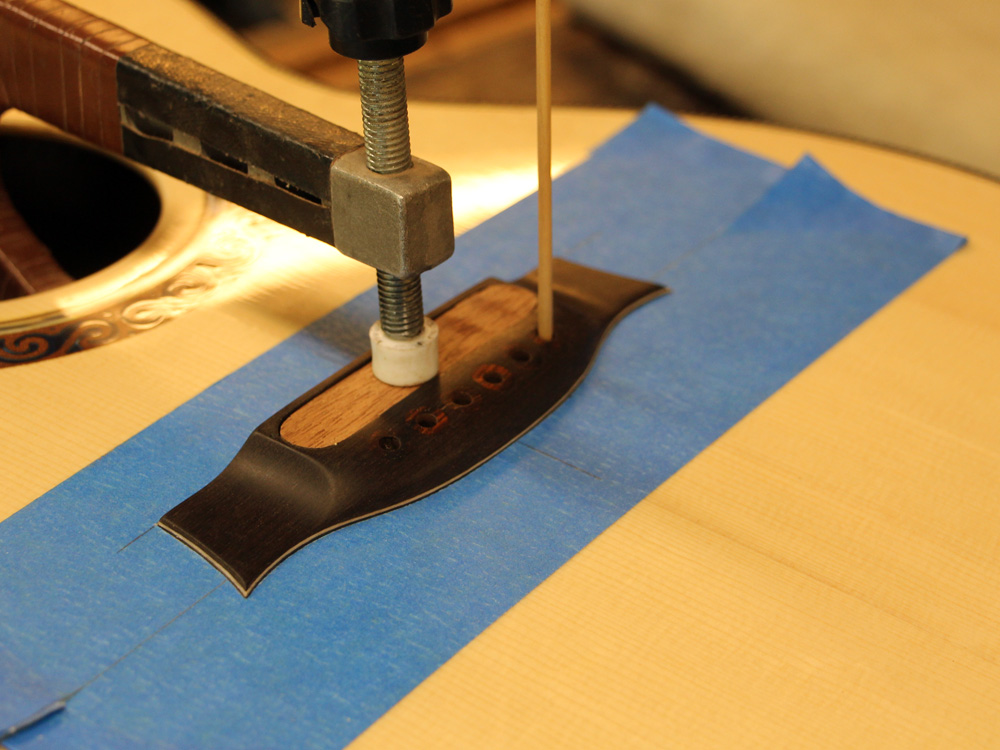
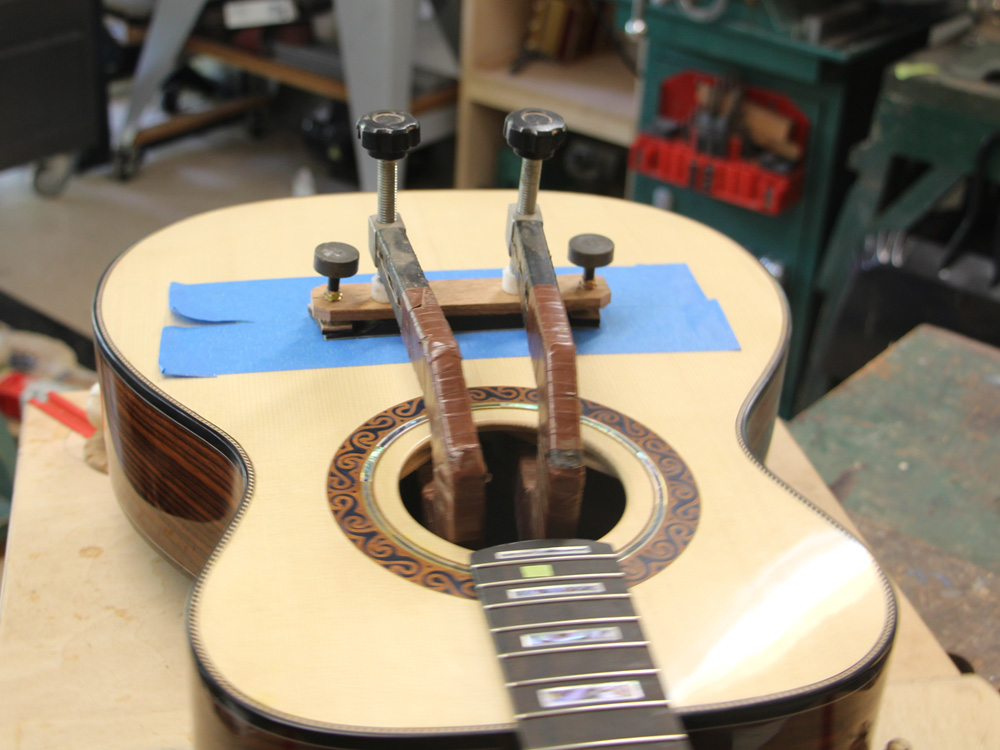
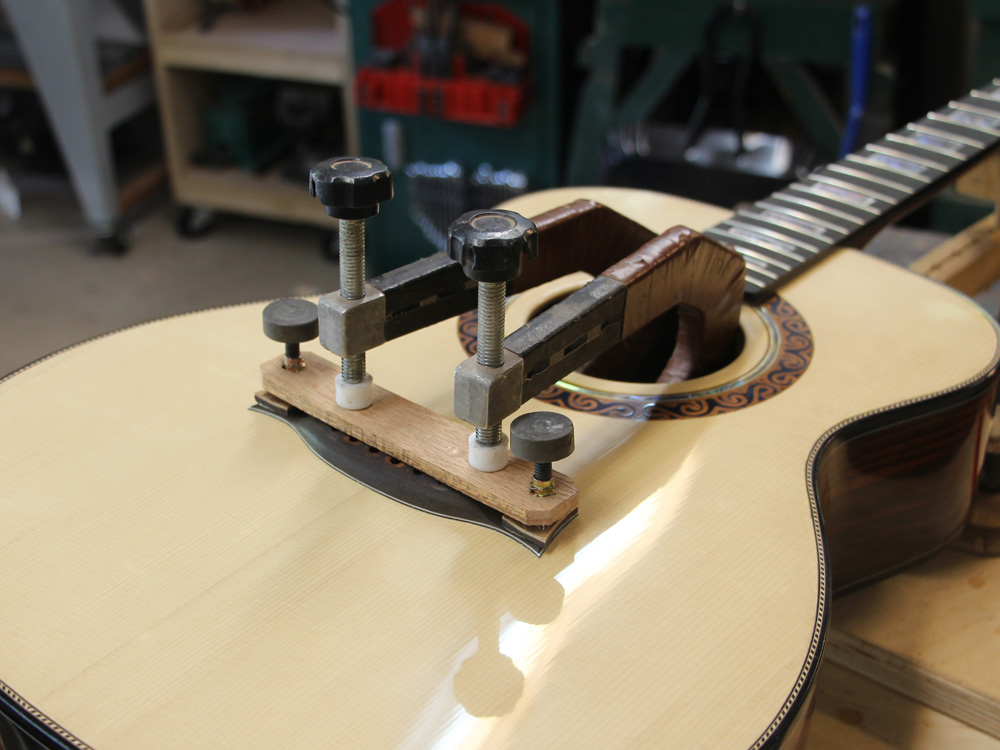
I mask off the area and position the bridge with a long c-clamp. Then I dill two holes through the bridge pin holes and insert dowel pins through the holes. With the dowel pins in place the bridge will hold its position when it is glued to the top.
 ( 257 ) 26-Aug-2014
After scoring the lacquer around the perimeter of the bridge I scrape away the lacquer where the bridge will be glued down.
 ( 258 ) 26-Aug-2014
A bit of glue goes on the bottom of the bridge.
 ( 259 ) 26-Aug-2014
And the bridge is then glued in place.
 ( 260 ) 26-Aug-2014
I let it set up over night.
 ( 261 ) 26-Aug-2014
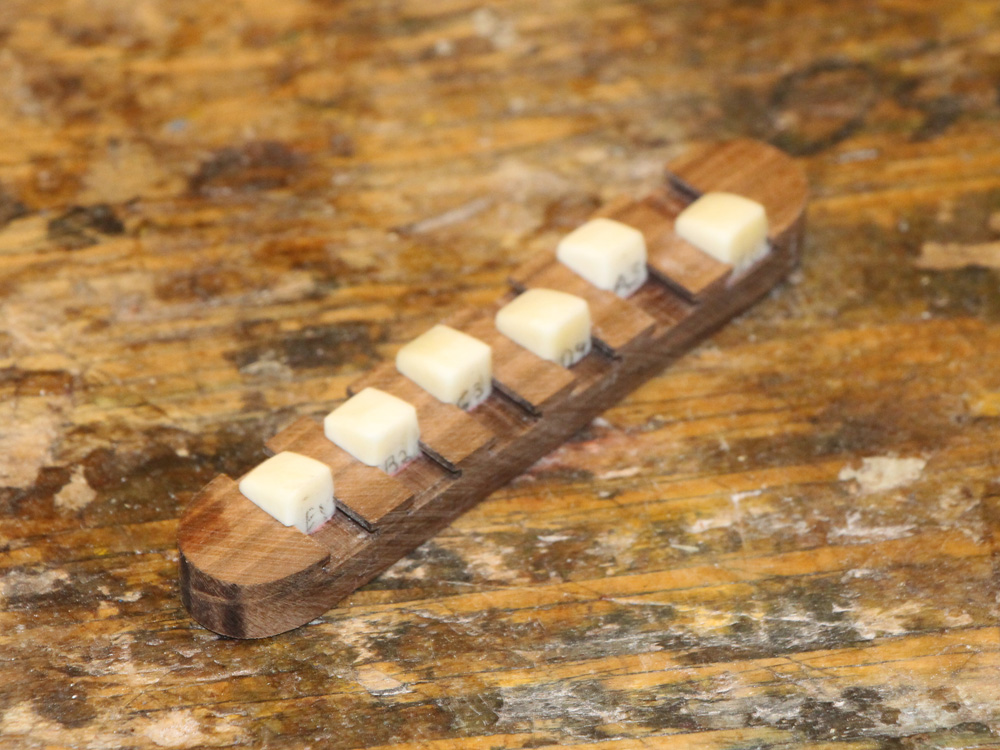
Next I use the CNC router to make the saddle plate, and a little hand work makes the individual saddles. These saddles will slide in their T-slots so the intonation of each string can adjusted individually. The saddles are designed so they can be adjusted with the strings in place, and will remain in place when the strings are changed.
 ( 262 ) 26-Aug-2014
Finally I make the nut, and then the guitar is ready to be strung up.